
Unreal Tutorial Swinging Pillars
Posted: November 01, 2020


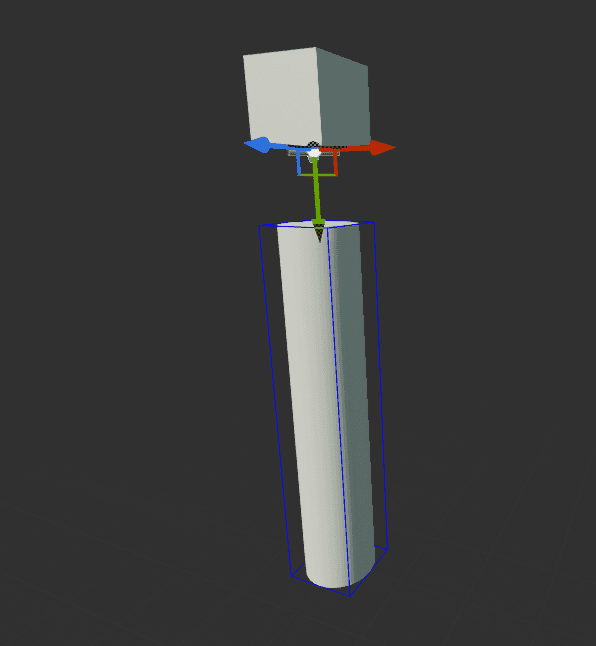
Create Pillar
when I created the project I checked include starter content, this gave me the basic shapes to work with. I used a square shape and a cylinder shape for the pillar shapes.
- create new blueprint name it pillar
- add two static mesh components one for the pillar the other mesh will act as the holder. (the Square shape is just for visuals you could easily just add a sprite component)
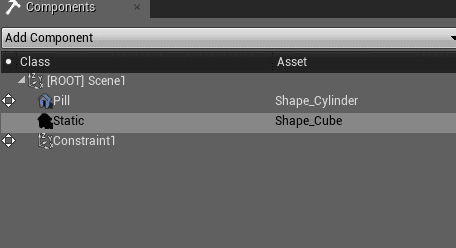
- Make the Square static
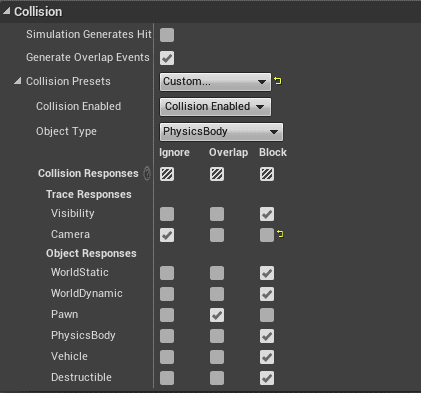
- Make the cylinders moveable and check simulate physics and change collisions. for collision you can either enable overlap pawn and ignore camera or collide with the player pawn and ignore camera. The latter will just fling the character after hitting it could be what your looking for. Just make sure the events are being created.
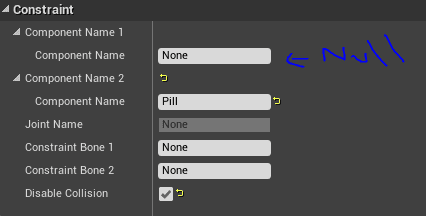
- add a physics constraint actor and link it to the two static mesh.
(you don't have to link it to the square static mesh for it to work)
just for following along sakes just type in the name of the shape your using that is static.
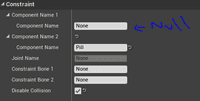
- Change Settings of the constraint actor to make the pillar swing like we want it to.
- Lock all linear limits, lock angular swing 1 and 2 motion, limit angular twist motion and make the twist limit 45. If you zoom in you will be able to see the movement the swing will be constrained too.
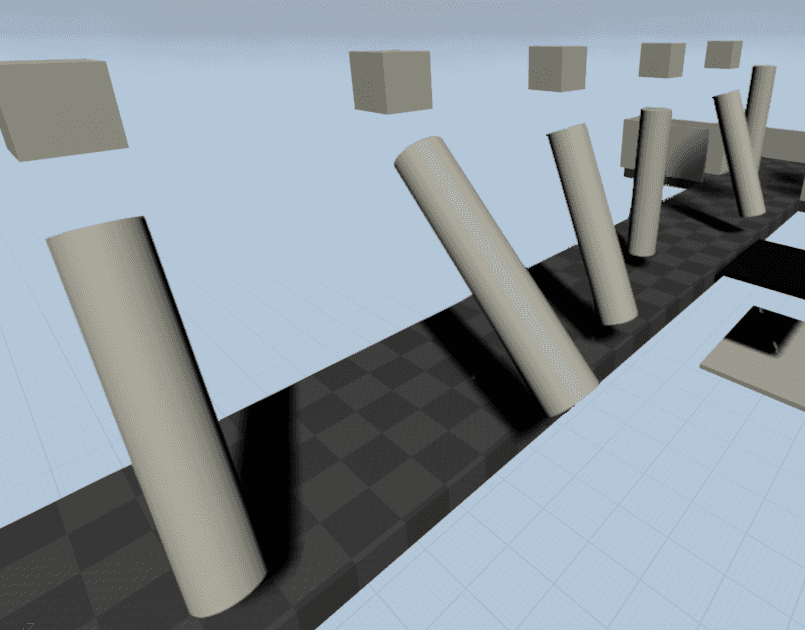
Final View
Note: the reason I didn't add a radial force actor, was because there are issues with it working. I posted the bug up on unreal answer hub. (link below)
Answer to Question about impulse bug
So after I finished the tutorial, did some more testing and found out you can create a radial force actor dynamically and set and edit values at run time. This is the better way I reckon as you don't have to create two radial force actors that are persistent in the level, as you cannot change the values at run time. Which is why I used to radial force actors to control the pillar swings.
Make it Swing
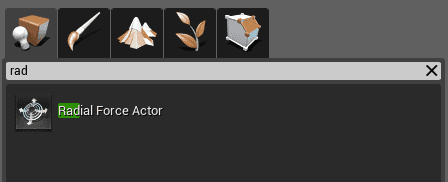
- search for radial force actor in the modes tab
- drag and drop near the pillar

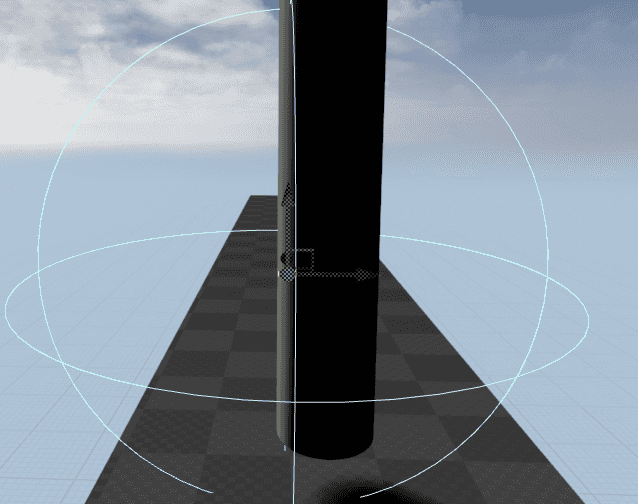
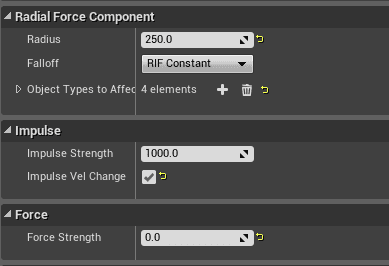
This will be the first impulse that will fire the pillar, so we will need to change the settings
- radius 250
- impulse strength 1000
- impulse vel change check to true (this allows us to use small values in impulse strength)
- force strength to 0 or
- Turn of auto activate (this allows for force strength to work straight away,
- impulse strength can only be applied via blueprint).
- To Reference the radial force actor we will create a variable to store it via blueprint so we can code everything inside the pillar blueprint and not use the level blueprint.
- Create a variable named impulseactor1, of variable type radialforceactor and check editable,
- create a second one for later use.
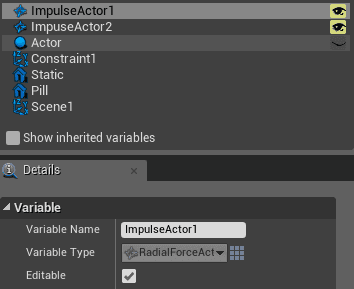
Make sure you reference the variable in the level editor, by click the pillar blueprint and setting the variable under the default section of the details tab.

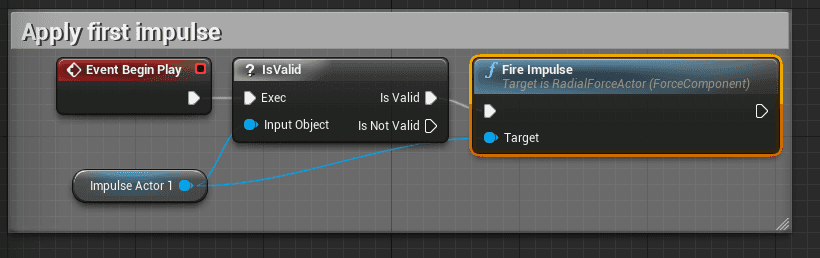
- For first impulse, create event begin node, connect to a isvalid node and use the impulseactor1 variable for the inputobject input. Just to check if the variable contains an actor of its type.
- Then grab the output of the variable and type fire impulse to create the node.
- Hit simulate to test.
Refire Pillar
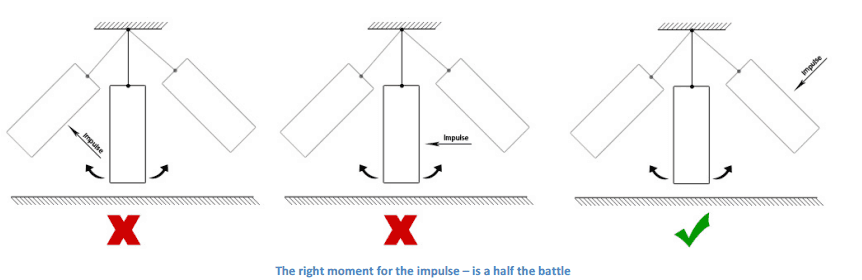
- Duplicate the radial force actor and just change the impulse strength to be 50. why? Exerpt from original tutorial Our Block start to swing without shooting it, but after a while it stops. That's because we give the Block impulse only one time. Let's make it continuous. What will happen, when we just set a delay between firing impulses? It will cause incorrect Block movement already on the third cycle. That means that we need to do it wisely. I've draw a little scheme explaining the theory of how to sustain the Block movement: therefore need to create an algorithm that will fire the second impulse at the right time. My approach was to check the angle of the pillar e.g. the pillar is greater that 50 degrees. But also to check its velocity so as to only apply the it when the pillar is swing to the left or right.
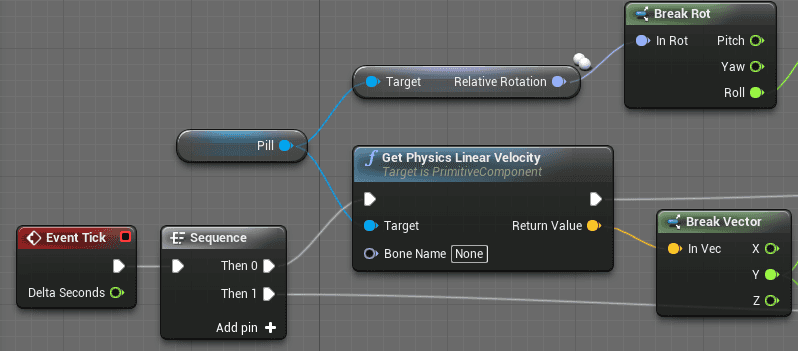
- Grab an event tick node connect it to a sequence node, Connect the first output to a
- get physics linear velocity node.
- Get the pillar variable and connect it to the target of the get physics linear velocity.
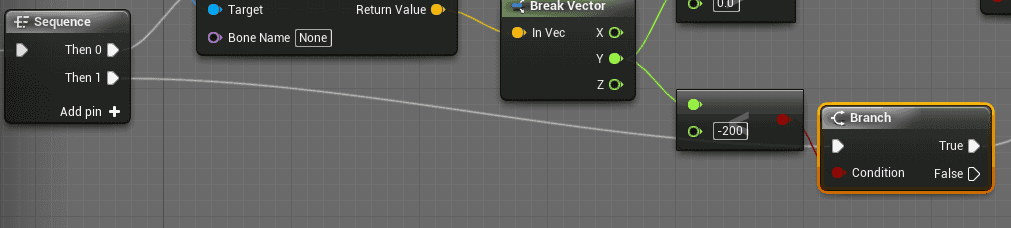
- Get the return Value and type break vector
- Grab the output of the pillar variable and type in relative rotation to the node,
- grab a break rot node and connect the ouput of relative rotation to the in rot input of the break rot.
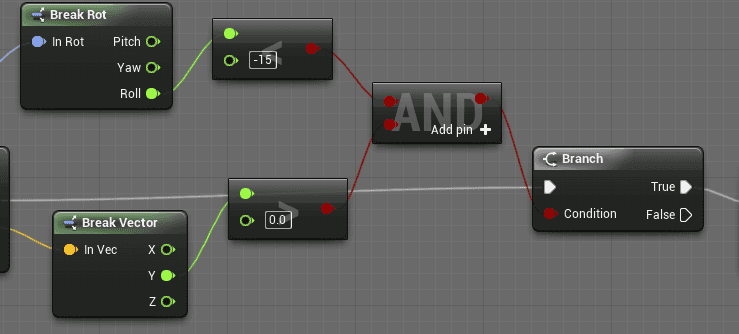
- Connect the output of Roll from the break rot node to a float < float node, type -15 for the break vector do the same with the y output and connect to a float < float leave at 0 Then connect both condition outputs to a AND Node and the result to a Branch Node.
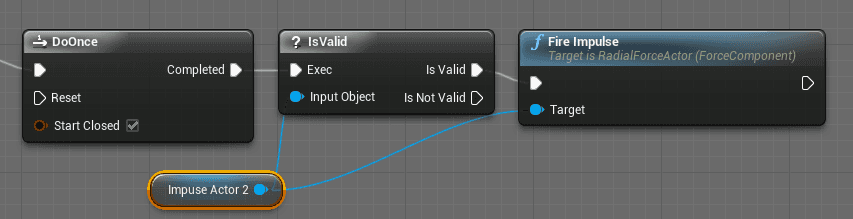
- Create a DoOnce node that has start closed checked and connect the output of true to it, Here create a isvalid node and attach the impulse actor2 variable to it then create a fire impulse node. This will the fire impulse firing continuously and only when the pillar is going to the right and at an angle, that is to the right of the force actor.
-
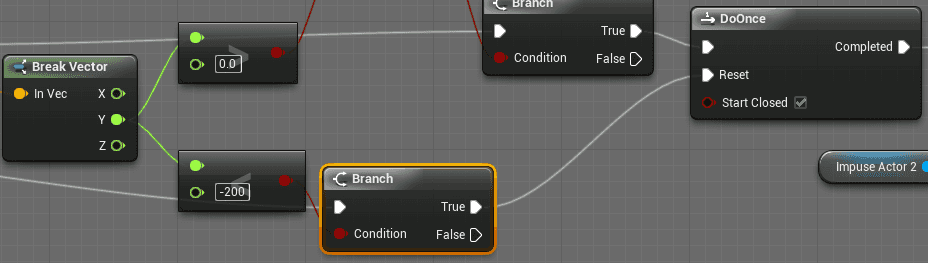
To fire the impulse again we need to reset DoOnce, so when the pillar is swinging in the opposite direction which we detect through its velocity.
-
Grab the y output of break Vector node and create a float < float and enter -200, connect the output to a new branch node and connect the true output to the reset of the DoOnce node. Finally connect the sequence Then 1 output to the new branch
Test the scene and remember at any time you can print to screen the values from break Vector and Break rot to see where I got the values for the condition checks.
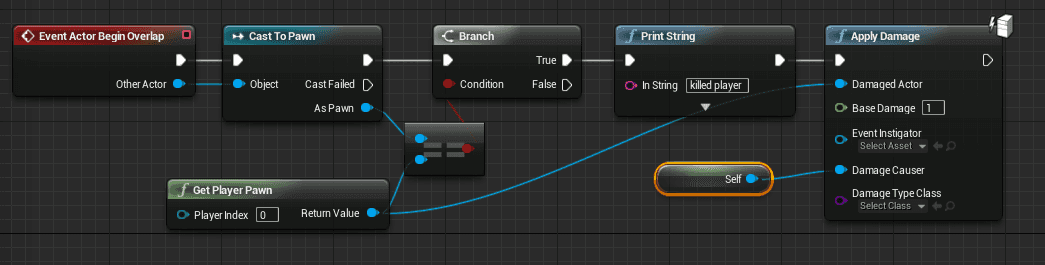
Collision With Player
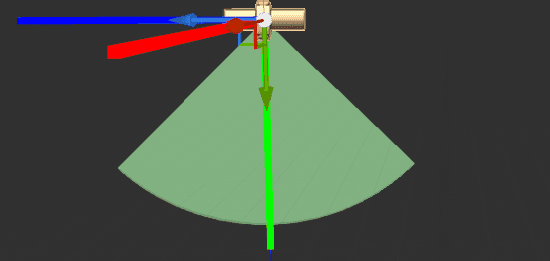
- For collision with the player I used the same method as I did for the Death Beach Ball
Place multiple Instances
- to make it easier to copy and paste the pillars in the level you should parent the ra
- dial foce actors to the pillar.

To get the pillars going in the opposite direction, for the first impulse just change the impulse to -1000, you can leave the 2nd impulse code alone.
Exercises
- use one impulse actor created dynamically via blueprint. (works I've tried it)
- try randomising movements of the pillars.
- add trigger to stop movement or speed up the pillars.
- make the impulse firing more efficient
- create different pillars that swing from different angles.